MultiEdit Tutorial
Documentation v. 1.0
Created: December 31, 2018
Updated: June 25, 2025
Overview
Multiedit forms are used to create controlled editing pages for users. For instance, our previous multiedit forms:
- UGC Course Pages
This showcased a list of courses for students to choose from. They also had their own pages as well. This is primarily used as the list view.
List View Example - Study Abroad Programs
The grid is a more custom implementation but is the list view for all of the programs. Clicking on any of the programs will bring it to the detailed view that all of the programs share.
Detail View Examples - Faculty Job Listings
The table shows the listing of all active job postings. Clicking on the title will take the user to the detailed page.
List View Example
More Info on Multiedits from Modern Campus:
Resources
Data Schema
One of the first steps to creating the multiedit is to have a visualization of all the data fields that will be used in the project. This is important because we want to make sure the data fields don’t change in the process of building the actual form itself.
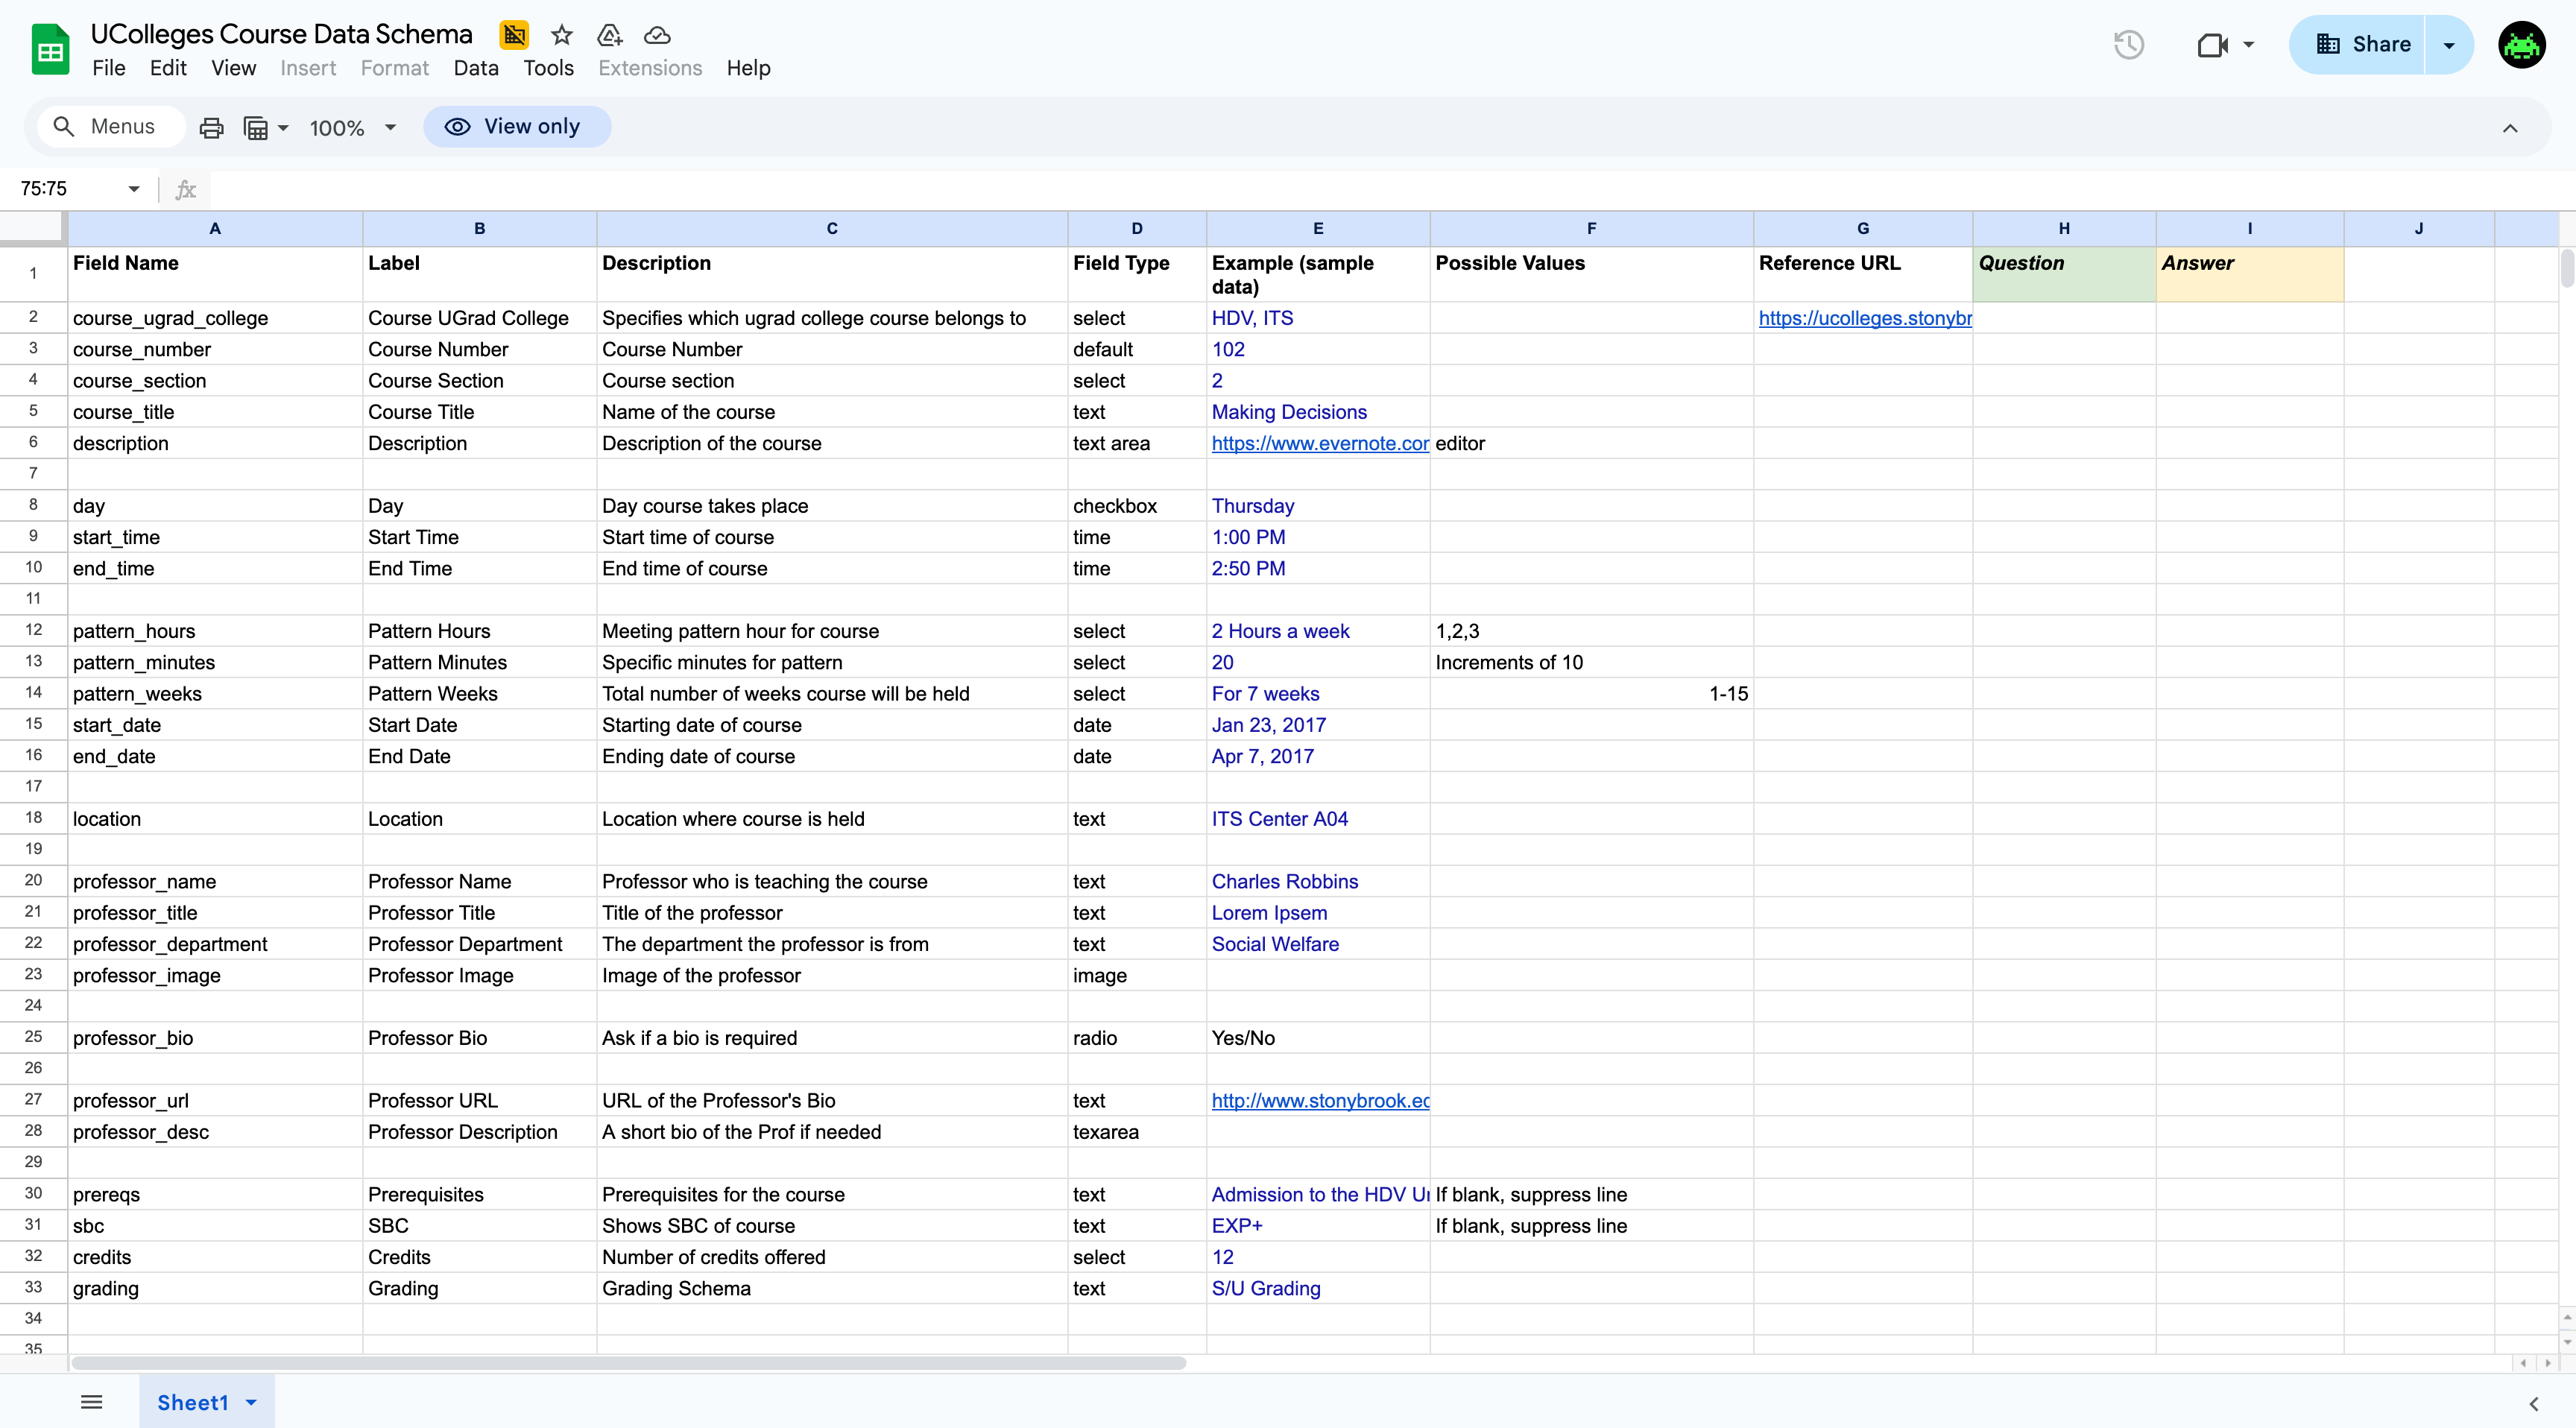

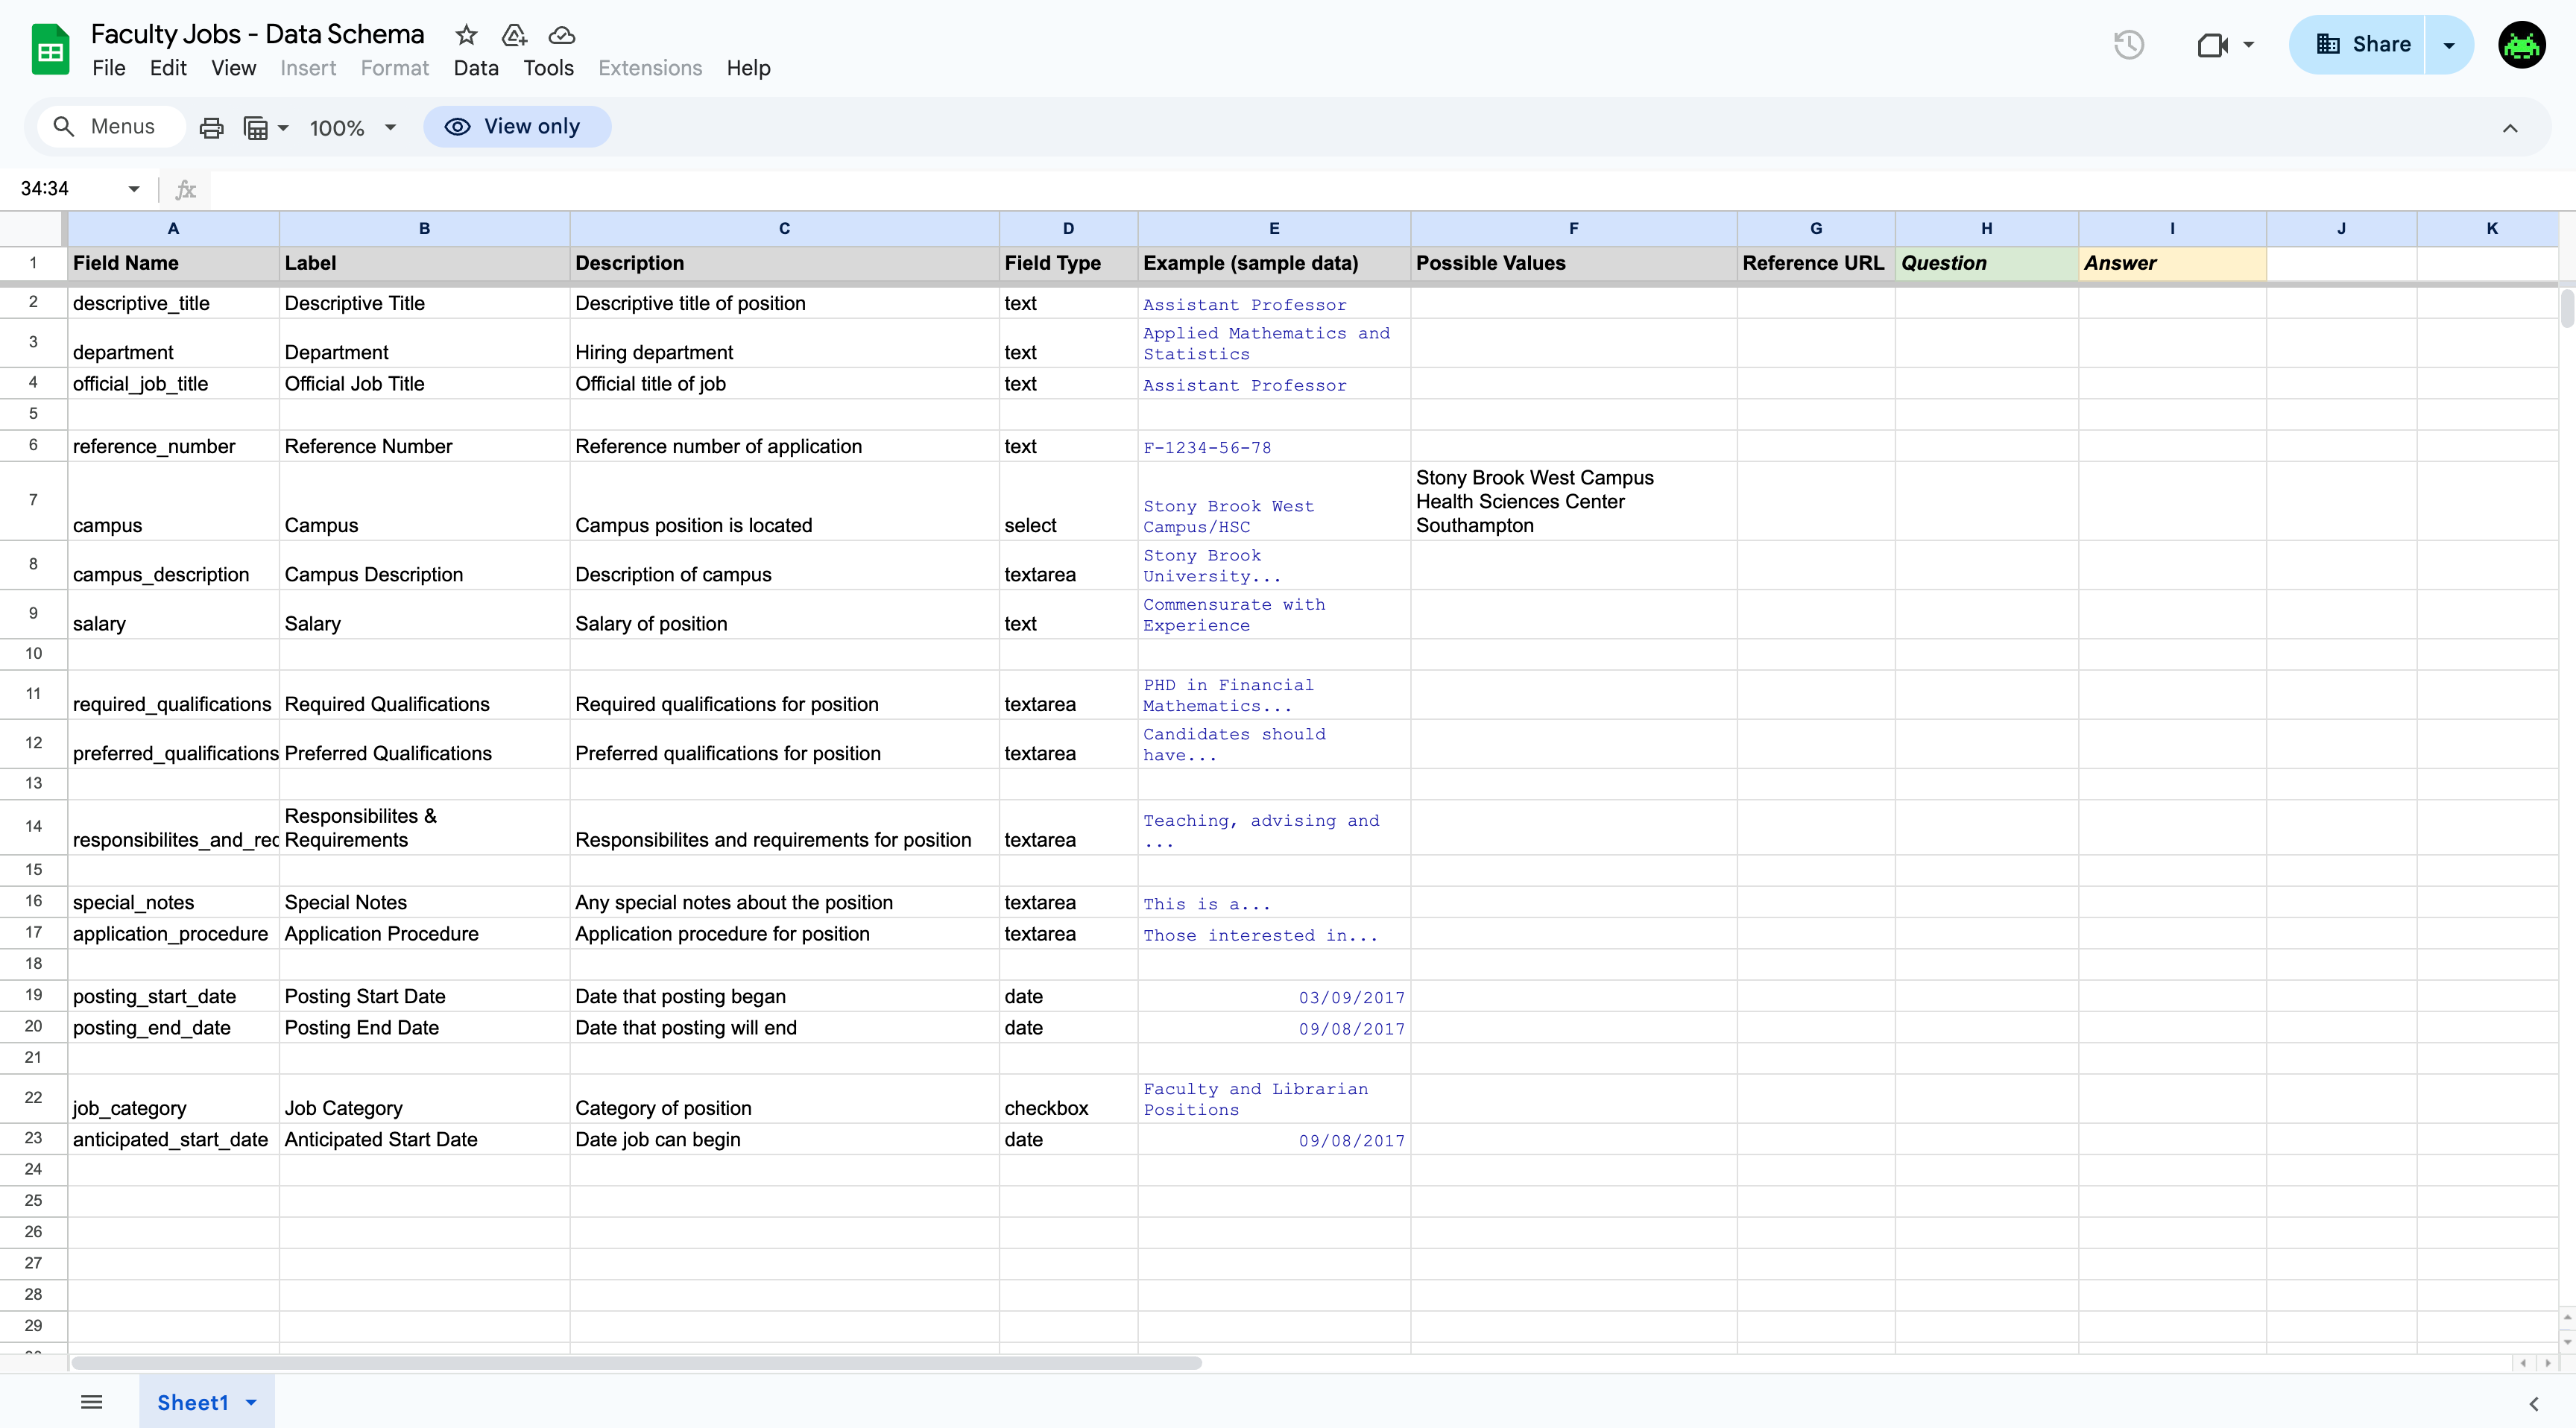
Due to the nature of the file-based system, we want to make sure the final data schema lasts as long as possible because changing fields after multiple pages are made will require a find and replace.
Design Draft Pages
After confirming that the Data Schema is correct we can move on to creating a draft page. This will be the sample output for the department. It will use static data and the tools we have in the CMS to accomplish this.
There are typically 2 pages that are made with multiedits:
- List Page: This page pulls in some parts of the multiedit and creates a list of the total number
of multiedits for the user to click to go to.
Example List Page - Detail Page: This page utilizes all of the fields from the multiedit and is usually found from
the list page.
Example Detail Page
If you go into the source, you can see that the data is not being pulled in but rather is a template for the department to see.
Feel free to reference the multiedit examples above to get a better understanding of these two types.
Multiedit Draft Page
After the design has been worked on, you can now begin to take the data from the Data Schema and build the form. This is just the data side, so don’t expect any output when drafting.
Check out the backend on this sample draft:
View Multiedit Draft
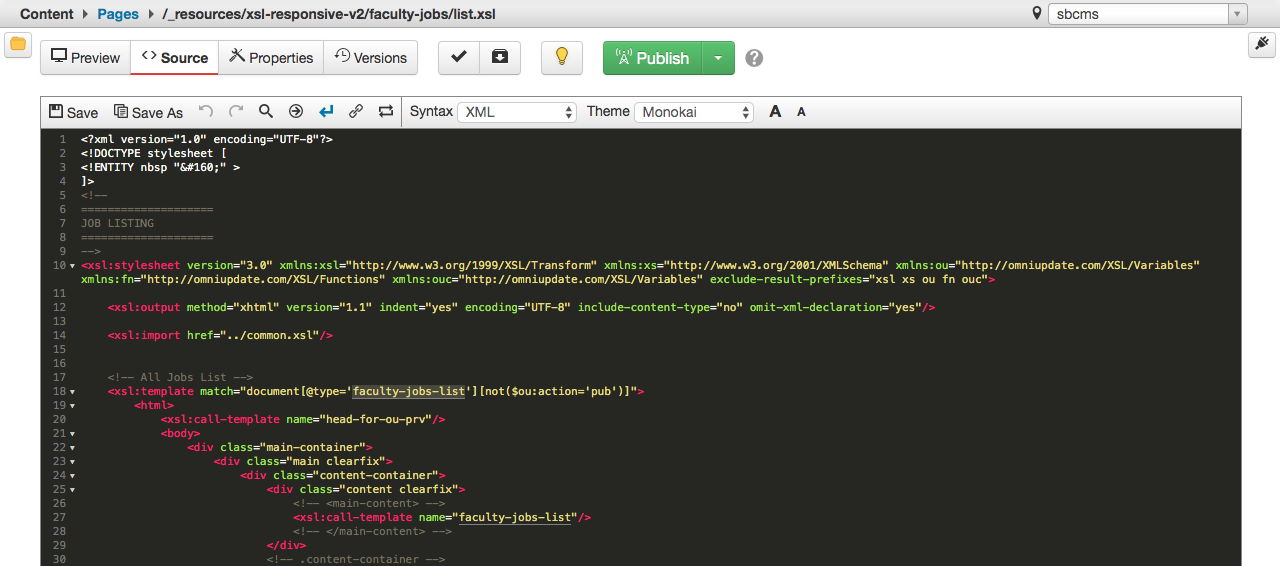
Development for Detail
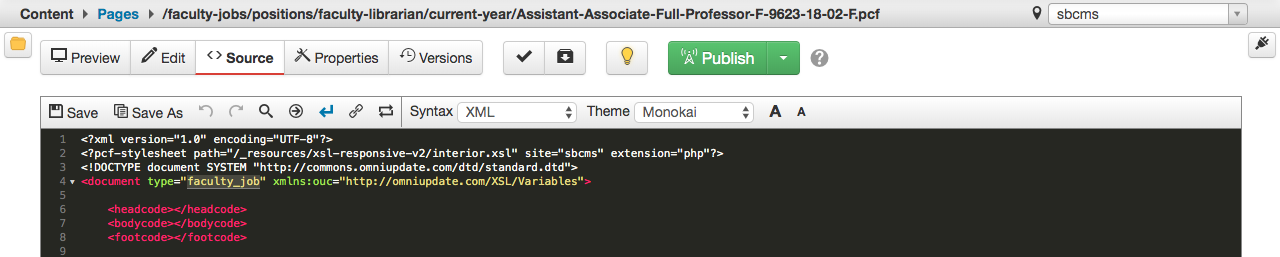
After the drafts are both accepted, we can try connecting both of them with XSL. In
the common.xsl file found in _resources we can draw the data we made from the forms.
*It’s important to develop this part in _dev due to risk of bringing the site down*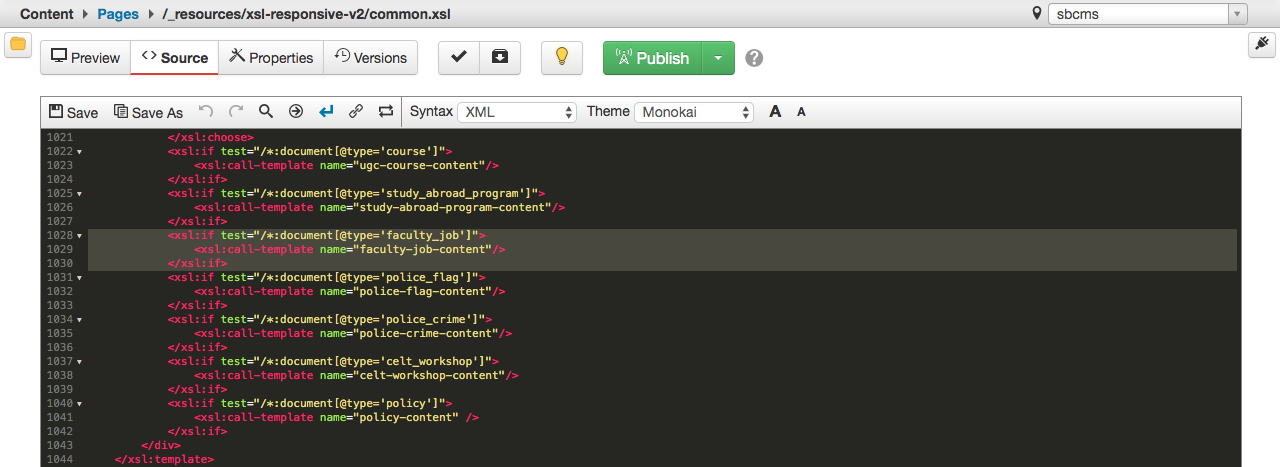
As seen in the screenshot above, there are templates we must match for the page to
be rendered with the correct layout. In this case the template it is looking for is
“faculty_job” which all of those multiedits will have.
Then it will match with the layout we build below.

You can test by previewing a .pcf with data.
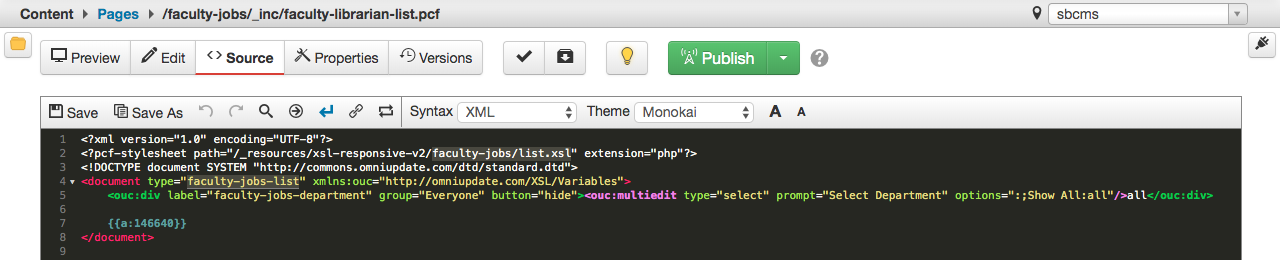
Development for List
The list works very similar to the detail. Essentially it comes down to initializing variables and adjusting the output. In this case, for the Faculty Jobs, it was put into a table with four pieces of data.
The file located in the _inc folder will have the template type that we’re matching for the list page.
Templates
To make it easier for the users to make files with the multiedit layout, we place them in template files.
- TCF: This is a wizard that allows the user to input data into their multiedit. This is
what the user sees when creating a new multiedit page.

- TMPL: This is the file that’s created after, with the full multiedit.
These template files are located in the outemplates folder in sbcms.
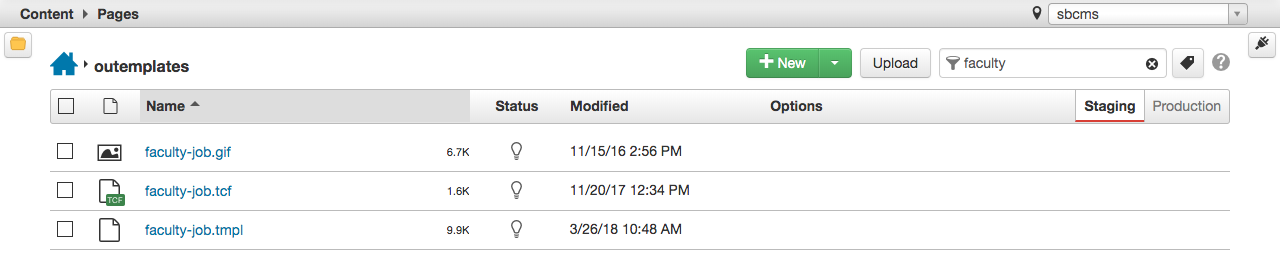
The .gif file represents what the icon for the template will be.
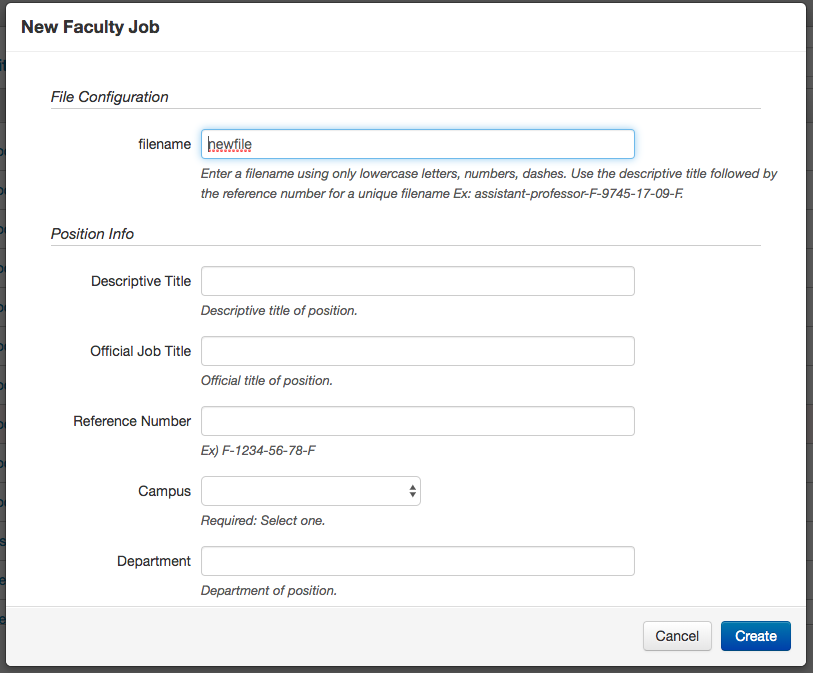
Setting up the _inc Folder
After the multiedit has been set up, we have to configure the assets that will be published.
XML Data File
After the multiedits are set up, we can scrape the data into an XML file with the help of XSL.
For the Faculty Jobs example, we have the XML script in XSL that is looking in three different directories to create one large XML file: Faculty Jobs, Health Science Jobs, and Nurse Practitioner Jobs.
The only purpose of this page is to render the XML script on a live page. The only
thing needed is to point the XSL path to the XML script as well as update the extension
to .xml.
